Prowlarr
What is Prowlarr?
From their Github repo:
Prowlarr is an indexer manager/proxy built on the popular *arr .net/reactjs base stack to integrate with your various PVR apps. Prowlarr supports management of both Torrent Trackers and Usenet Indexers. It integrates seamlessly with Lidarr, Mylar3, Radarr, and Sonarr offering complete management of your indexers with no per app Indexer setup required (we do it all).
So basically, we’re going to use Prowlarr to search for torrents, and then it will pass those on to qBittorrent or SABnzbd to download. Think of it as your personal search engine! 🔍
Initial configuration
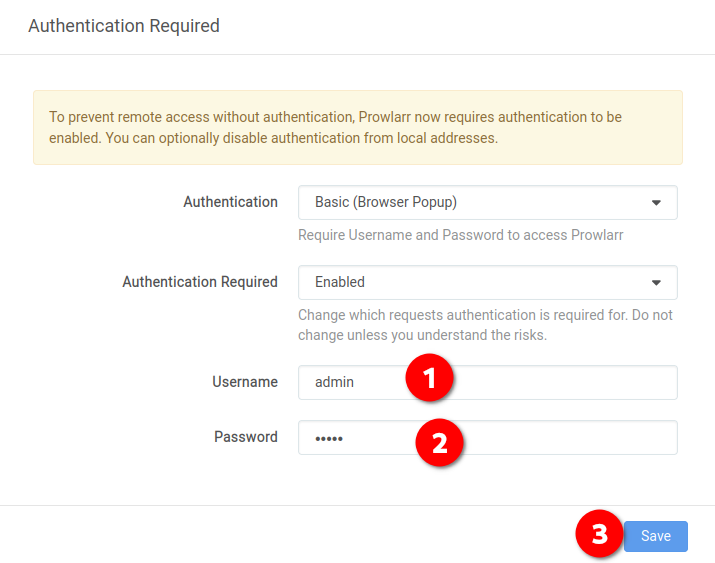
In your browser, go to http://{your-ip-address}:9696/ and you’ll see the “Authentication required” screen. Let’s set up some basic security:
- Select “Forms (Login Page)” as the “Authentication Method”
- In “Authentication Required” select “Disabled for Local Addresses” (so you can browse freely on your home network)
Understanding Indexers
Before we dive in, let’s talk about the two types of indexers you can use with Prowlarr:
Usenet Indexers 📰
Most good Usenet indexers are paid services, but they’re usually pretty affordable and worth checking out! A couple of popular ones are:
- DrunkenSlug (invite only!)
- NZBGeek
Remember, if you want to use Usenet indexers, you’ll also need a Usenet provider configured in SABnzbd!
Torrent Indexers 🧲
For this tutorial, we’ll focus on free torrent indexers since they’re easier to get started with. Just remember to always use a VPN when torrenting!
Adding Indexers
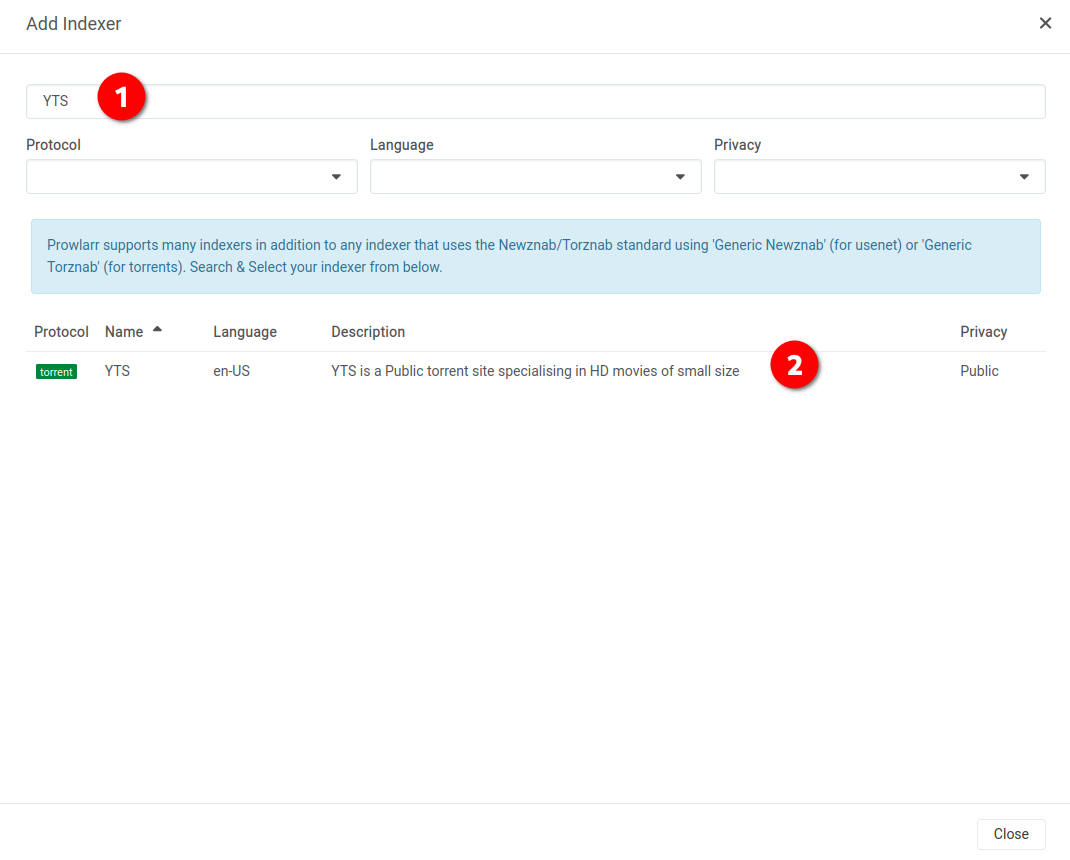
On the homepage, click on “Add Next Indexer” - time to teach Prowlarr where to look for content!
For this tutorial, I’ll add two popular indexers: YTS (great for movies) and eztv (perfect for TV shows). But you can add whatever indexers you like!
Find your indexer and click on it:
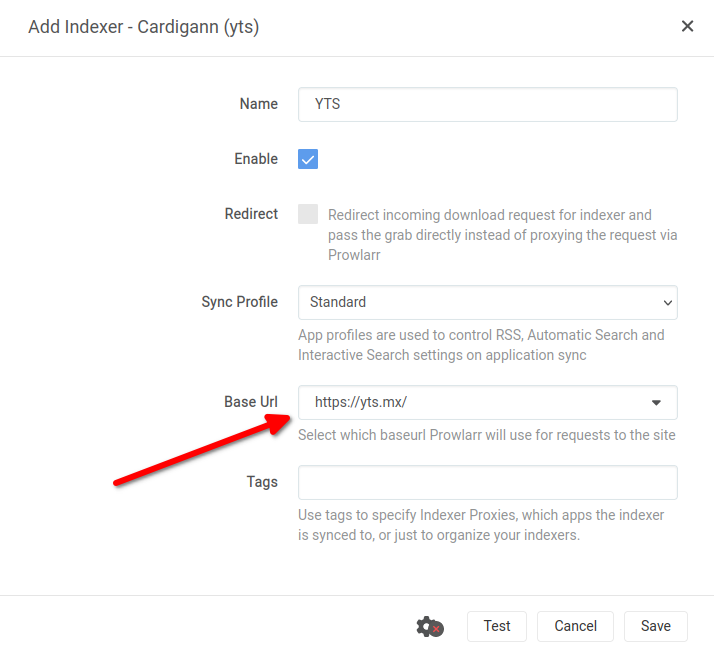
You’ll see a new modal called “Add Indexer - Cardigann (your indexer)”. All you need to do here is pick a URL from the “Base Url” list. Easy peasy!
Hit that “Test” button at the bottom - if everything’s working, you’ll see a happy green checkmark! ✅


Looking good? Click “Save” and you’ll be back at the “Add Indexer” modal.
How many indexers should I add? 🤔
As many as you want! Just repeat those steps for each new indexer in Prowlarr. The more indexers you have, the better chance of finding what you’re looking for! It’s like having more libraries to check for books. 📚
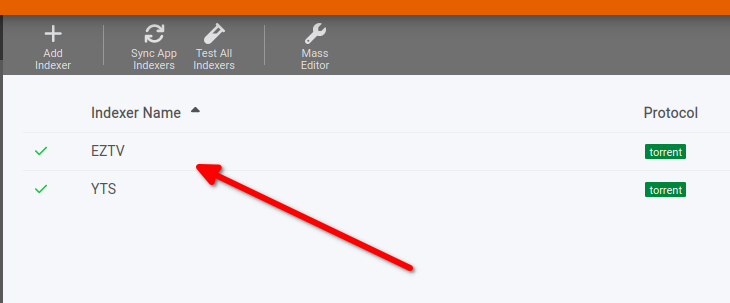
When you’re done adding indexers, close the modal and you’ll see all your indexers on the main page:
Connecting to Radarr and Sonarr
Now comes the fun part - connecting Prowlarr to Radarr and Sonarr! This is where everything starts working together. ✨
Radarr Connection
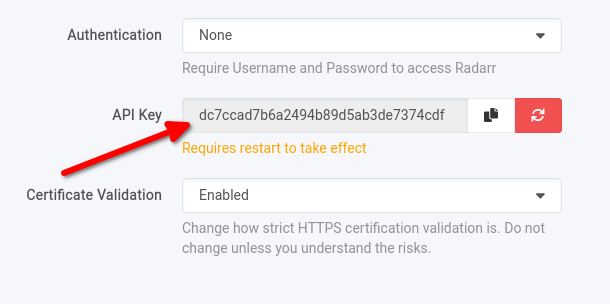
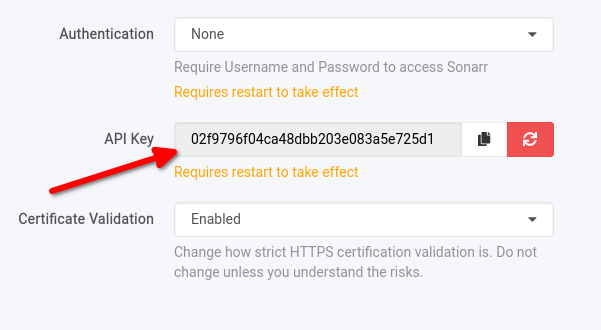
First, we need your Radarr API Key. Head over to Radarr’s settings at http://{your-ip-address}:7878/settings/general and look for the API Key under “Security”.
Copy that API key and keep it handy!
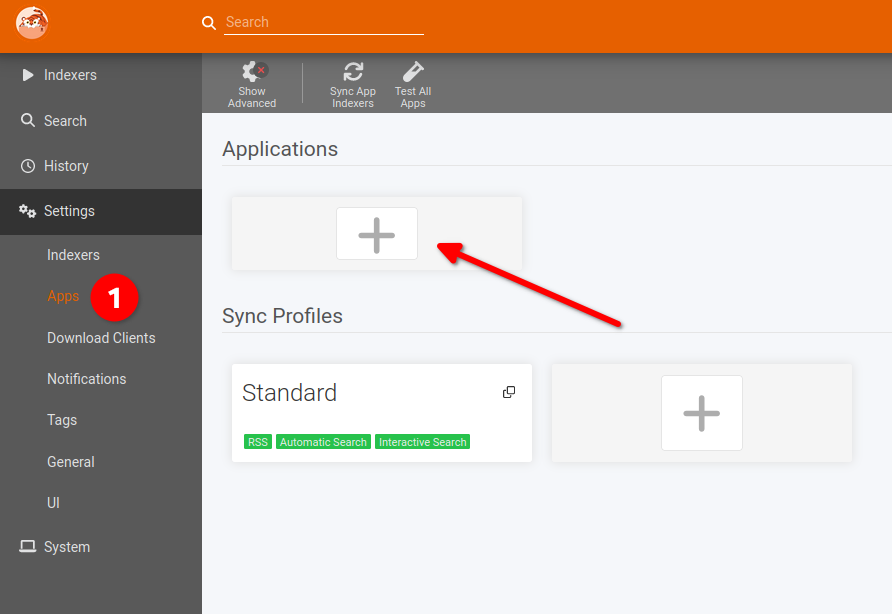
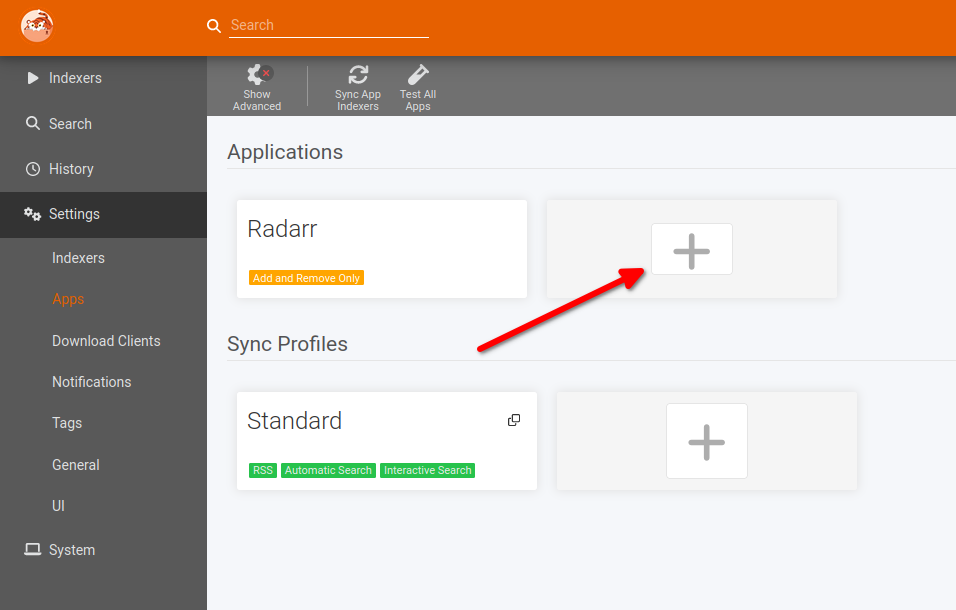
In Prowlarr, go to “Settings”, click “Apps” and hit the ➕ button.
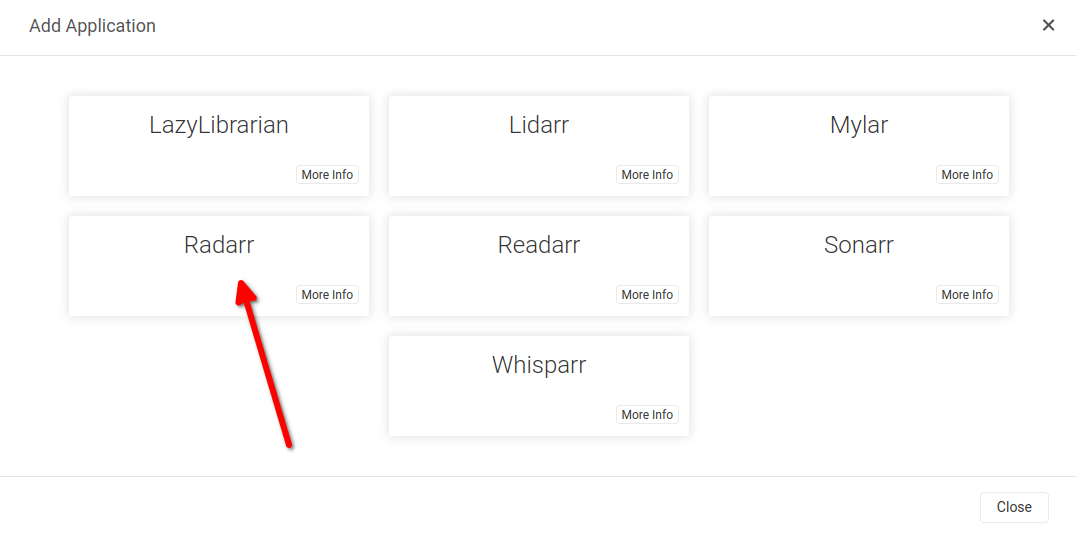
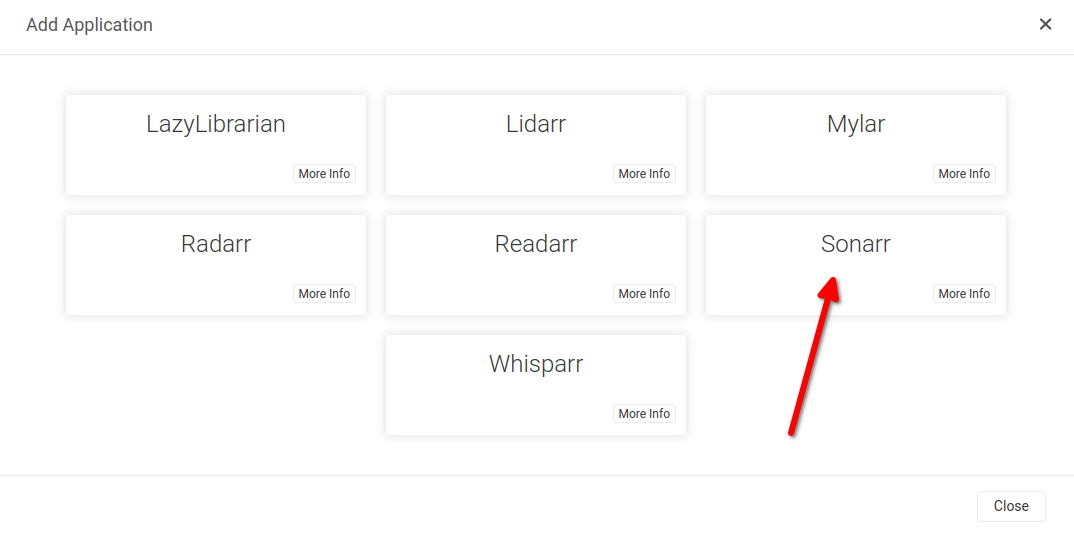
Click on “Radarr”:
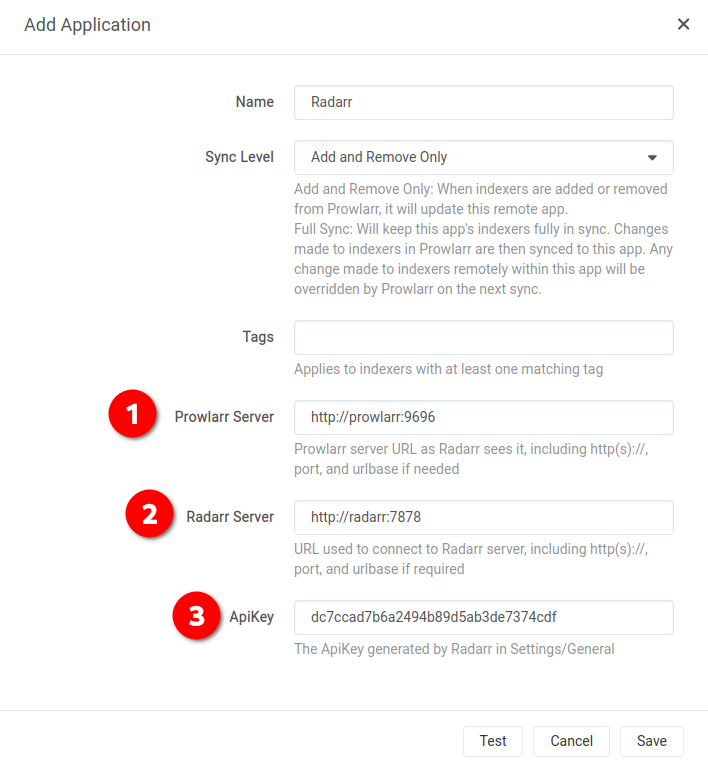
Fill in these details:
- Prowlarr Server:
http://prowlarr:9696 - Radarr Server:
http://radarr:7878 - API Key: paste your Radarr API key here
Test time! Click that “Test” button - hopefully you’ll see a green checkmark! ✅


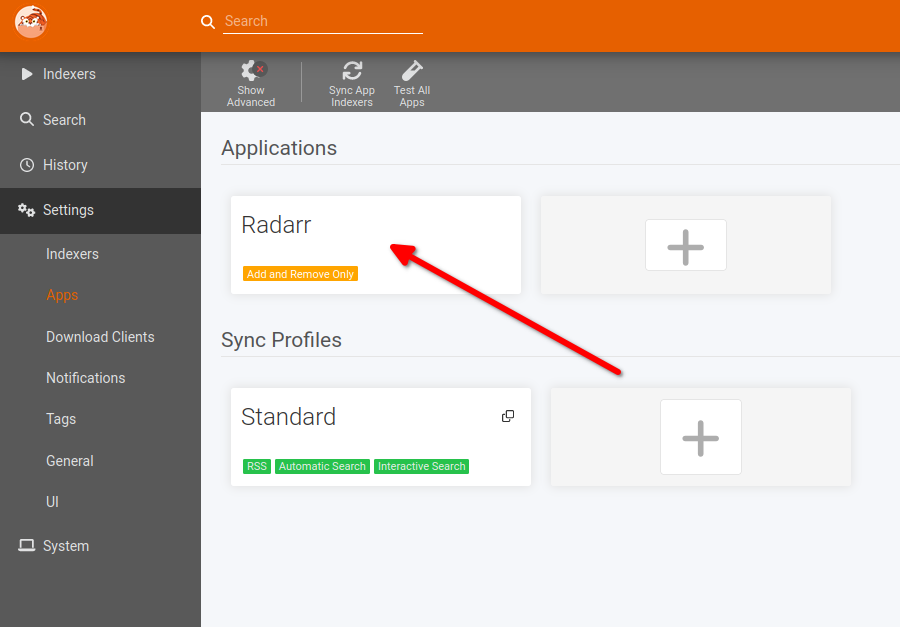
If the test passed, click “Save”. You should see Radarr in your Apps list:
Sonarr Connection
Time for Sonarr! First, grab your Sonarr API Key from http://{your-ip-address}:8989/settings/general - it’s under “Security” just like in Radarr.
Copy that API key for safekeeping!
Back in Prowlarr, go to “Settings”, “Apps” and click that ➕ button again.
This time click on “Sonarr”:
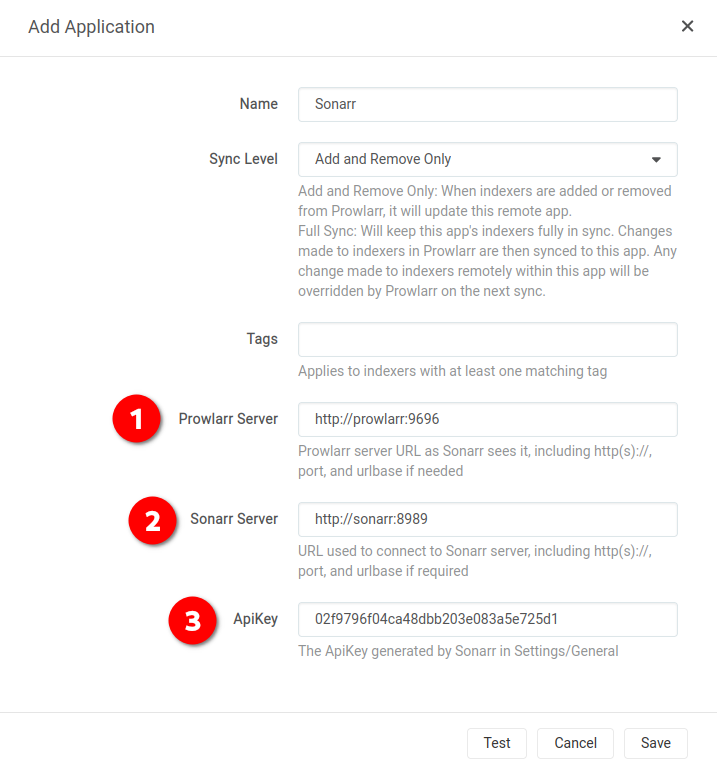
Fill in these details:
- Prowlarr Server:
http://prowlarr:9696 - Sonarr Server:
http://sonarr:8989 - API Key: paste your Sonarr API key here
One more test! Click “Test” - green checkmark time! ✅


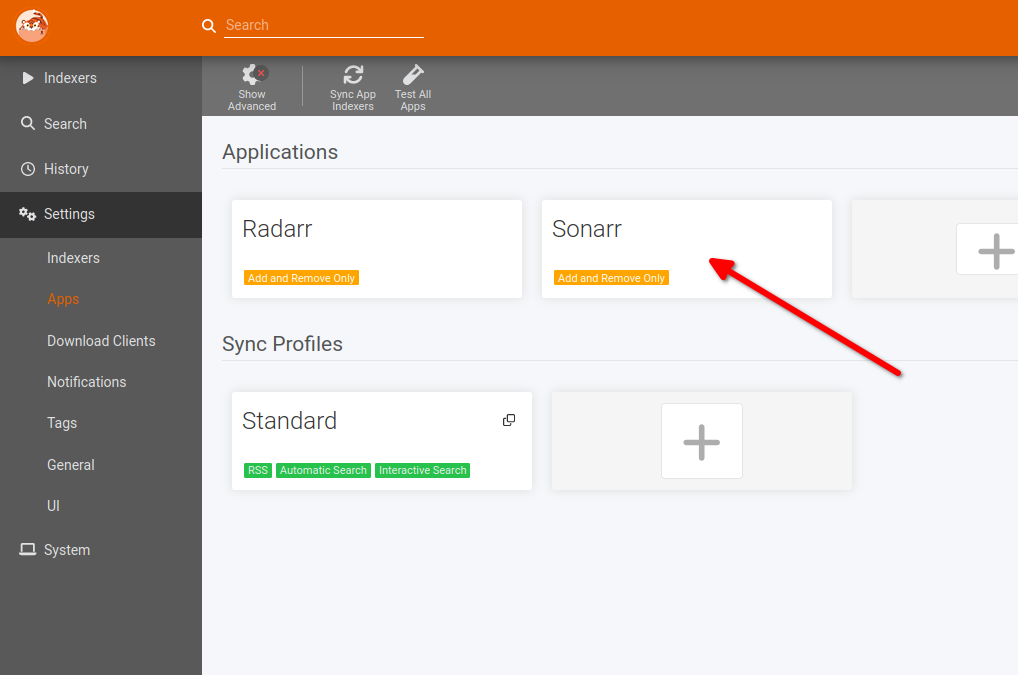
All good? Hit “Save”. You should now see both Radarr and Sonarr in your Apps list:
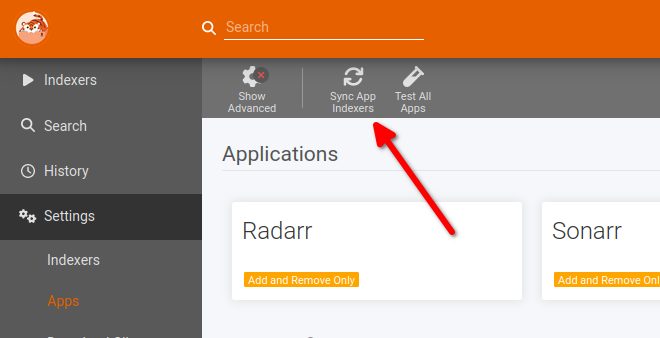
Finally, click on “Sync App Indexers” - this is where the magic happens! 🎩
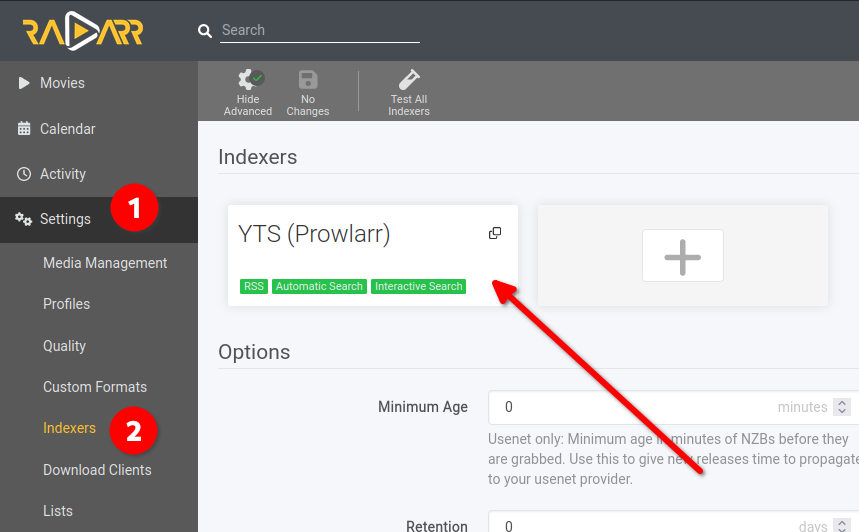
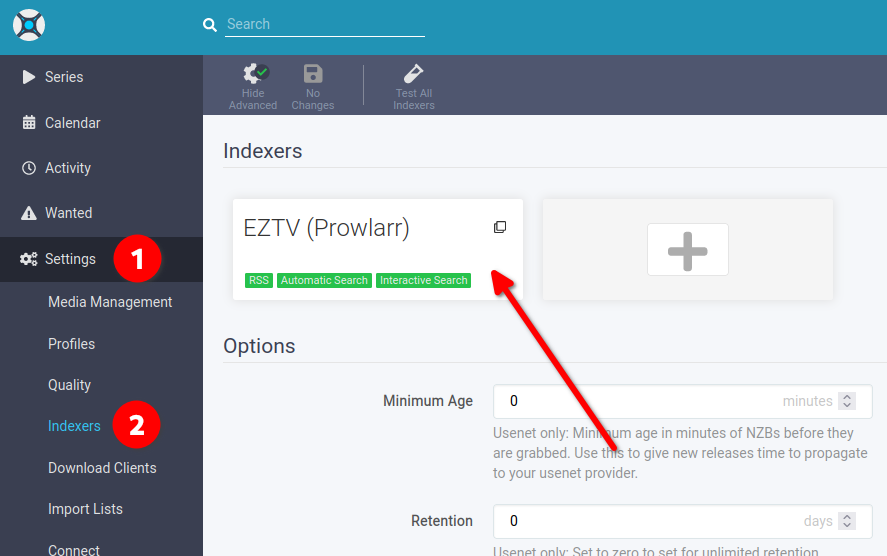
Want to see something cool? Go check Sonarr and Radarr’s “Indexer” settings - your indexers have been automatically added! No copy-pasting needed!
Moving forward! 🚀
Now we can move on to Bazarr - it’s going to handle all your subtitle needs!
Want to become a Prowlarr pro?
If you want to really dive into what Prowlarr can do, check out the TRaSH Guide for Prowlarr. They’ve got some amazing tips for power users! 🔧

